Run the application
- Understand the application
- Run the application
- Simulate failures
Now that you understand the Workflow and Activities, run the application. You'll start the Workflow, watch it appear in the Web UI, then start a Worker that executes the Activities.
Start the Workflow
First, start the Temporal development server with a database file and Web UI on port 8080:
temporal server start-dev --db-filename your_temporal.db --ui-port 8080
Temporal's dev server uses an in-memory database by default, which won't work for the failure demos. Specifying a database file ensures records persist when you restart.
Then run client.ts:
npm run client
You'll see output like:
Starting transfer from account 85-150 to account 43-812 for $400
Started Workflow pay-invoice-801 with RunID 67fe2aff-3aa9-4239-af38-9460720832d3
The Workflow is now running. Leave the program running. Here's how client.ts works:
import { Connection, Client } from '@temporalio/client';
import { moneyTransfer } from './workflows';
import type { PaymentDetails } from './shared';

import { namespace, taskQueueName } from './shared';

async function run() {
  const connection = await Connection.connect();
  const client = new Client({ connection, namespace });

  const details: PaymentDetails = {
    amount: 400,
    sourceAccount: '85-150',
    targetAccount: '43-812',
    referenceId: '12345',
  };

  console.log(
    `Starting transfer from account ${details.sourceAccount} to account ${details.targetAccount} for $${details.amount}`
  );

  const handle = await client.workflow.start(moneyTransfer, {
    args: [details],
    taskQueue: taskQueueName,
    workflowId: 'pay-invoice-801',
  });

  console.log(
    `Started Workflow ${handle.workflowId} with RunID ${handle.firstExecutionRunId}`
  );
  console.log(await handle.result());
}

run().catch((err) => {
  console.error(err);
  process.exit(1);
});
View the state of the Workflow in the Web UI
Visit the Temporal Web UI where you'll see your Workflow listed.
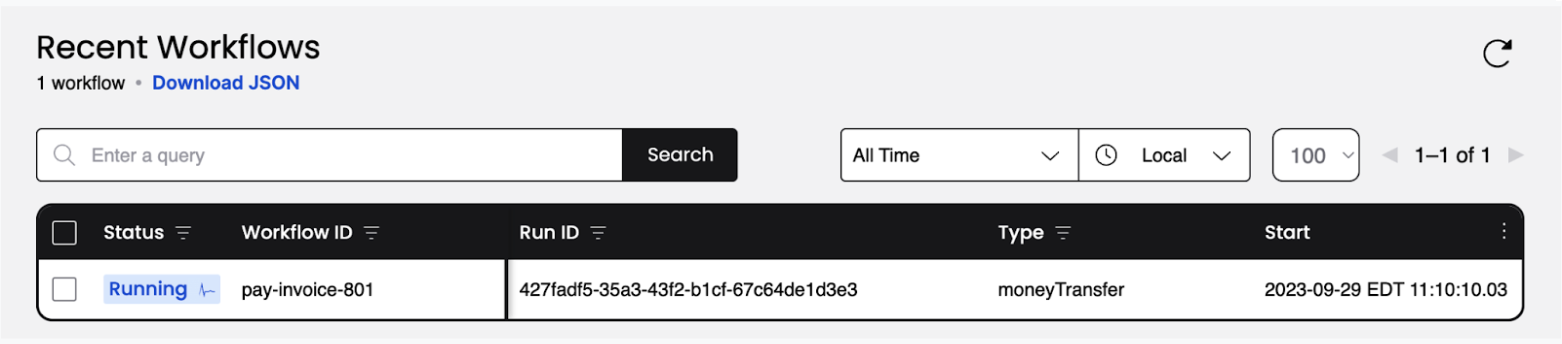
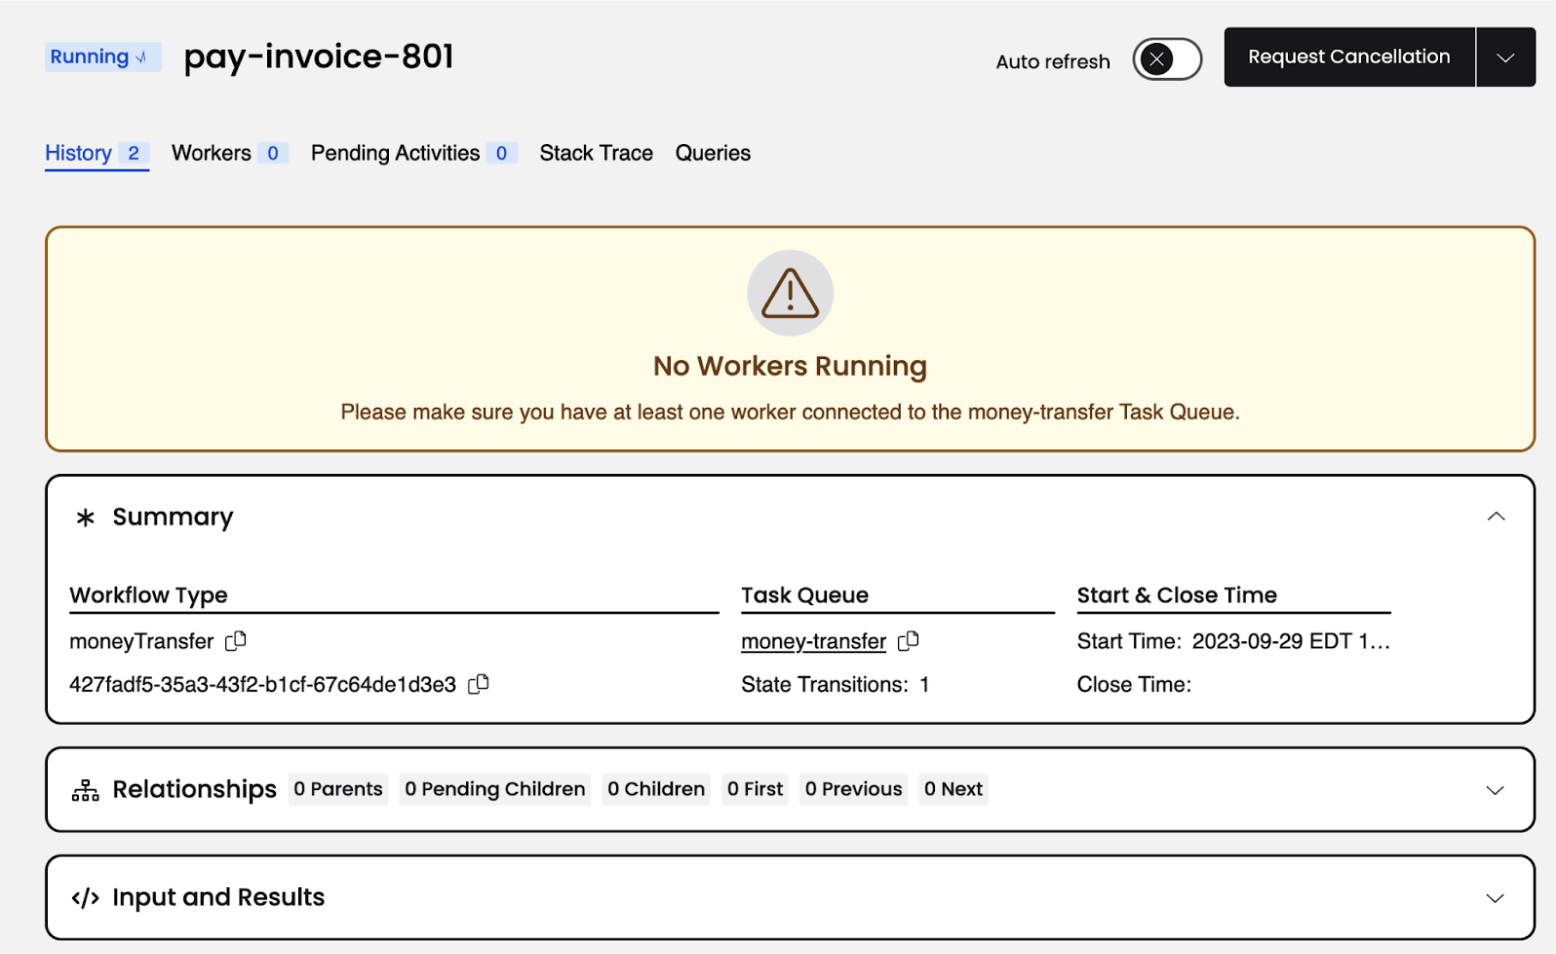
Click the Workflow ID. You'll see inputs, timeouts, scheduled retries, attempts, stack traces, and more:
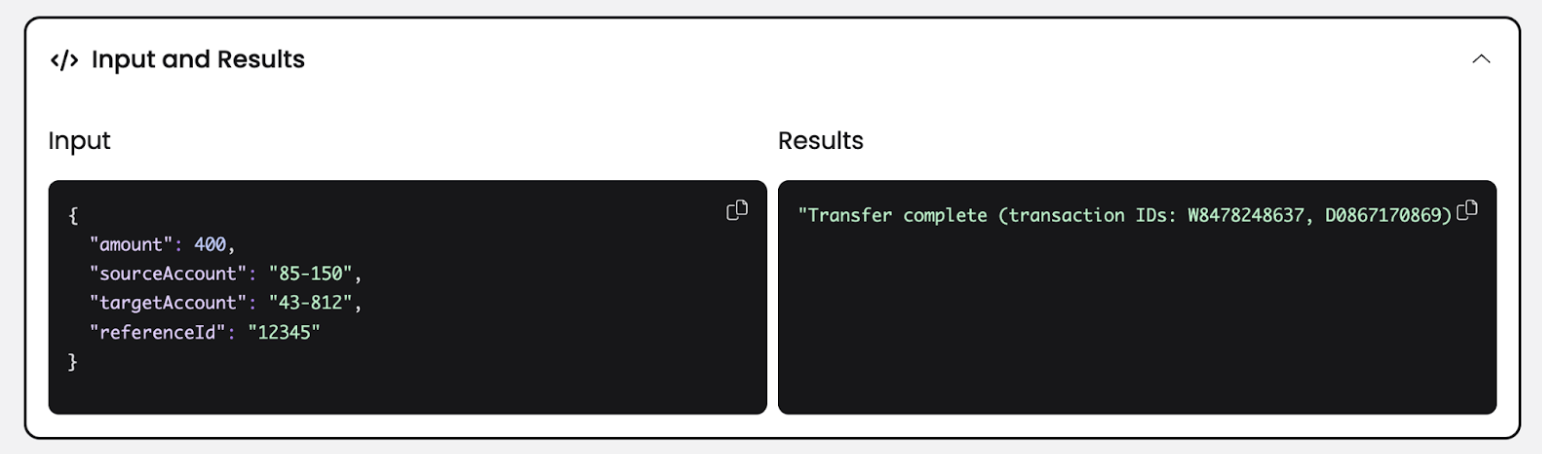
Click Input and Results to see the inputs:
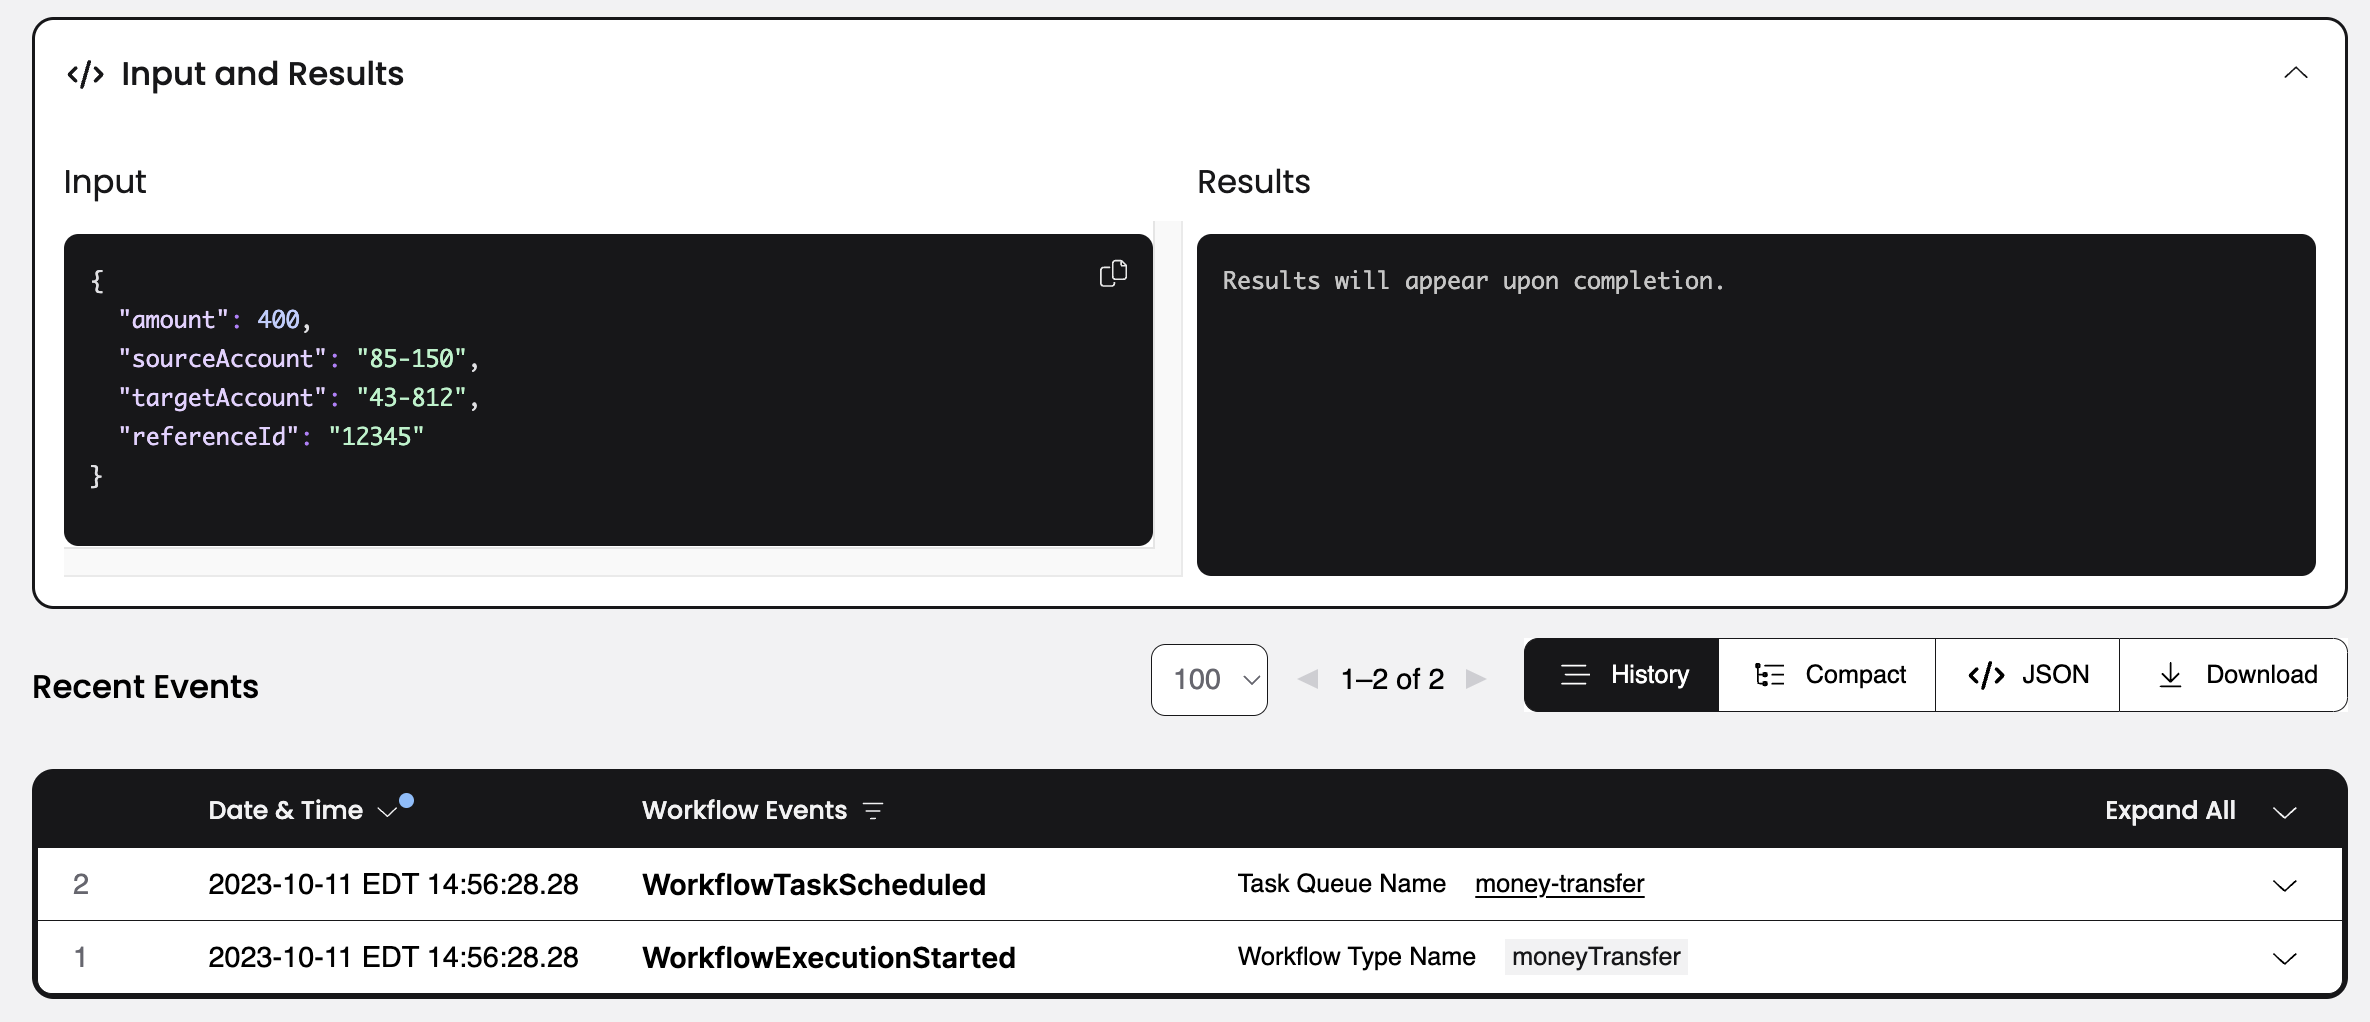
The Workflow hasn't executed yet - no Workers are connected to the Task Queue. You'll start the Worker next.
Start the Worker
A Worker:
- can only execute Workflows and Activities registered to it.
- knows which piece of code to execute based on Tasks from the Task Queue.
- only listens to the Task Queue that it's registered to.
Open a new terminal window. Run the Worker:
npm run worker
The Worker connects to the Temporal Cluster, specifies the Task Queue, and registers the Workflow and Activities:
import { Worker } from '@temporalio/worker';
import * as activities from './activities';
import { namespace, taskQueueName } from './shared';

async function run() {
  const worker = await Worker.create({
    workflowsPath: require.resolve('./workflows'),
    activities,
    namespace,
    taskQueue: taskQueueName,
  });

  await worker.run();
}

run().catch((err) => {
  console.error(err);
  process.exit(1);
});
When the Worker starts, it begins polling the Task Queue:
2023-10-11T19:17:18.918501Z Workflow bundle created { size: '0.74MB' }
2023-10-11T19:17:18.918501Z INFO temporal_sdk_core::worker: Initializing worker task_queue=money-transfer namespace=default
2023-10-11T19:17:18.918501Z INFO [INFO] Worker state changed { state: 'RUNNING' }
Switch back to where npm run client was running:
...

2023/09/29 05:40:30 Transfer complete (transaction IDs: W8478248637, D0867170869)
Check the Web UI again. You'll see one Worker registered and the Workflow completed:
You just ran a Temporal Workflow application and saw how Workflows, Activities, and Workers interact. Next you'll explore how Temporal handles failures.
Get notified when we launch new educational content
New courses, tutorials, and learning resources - straight to your inbox.